CurrentCost MQTT Bridge
04 Apr 2011Getting the data from a CurrentCost meter on-line has required either an always-on PC or something like the Arduino/Ethernet Shield set-up I’ve been using. That was the case until CurrentCost released their Bridge device.

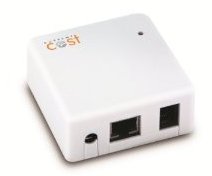
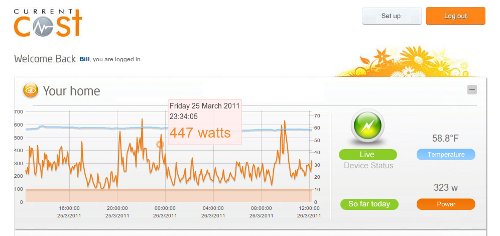
This little box plugs into the data port of the meter on one side and into your network on the other. It then sends the energy readings over HTTP, so you can then view it on your own dashboard.
Under the covers, the Bridge is essentially an Arduino and Ethernet shield relaid onto a single PCB by the good folk at the sadly-no-more TinkerLondon. This makes it relatively easy to reprogram for your own nefarious needs - or in my case, getting it to publish the data over MQTT.
John Crouchley has written about some of the specifics of the board and how it can be reprogrammed with the standard Arduino development environment using a custom USB cable. Not wanting to bother with making a custom cable, I stuck to using my USBtinyISP to flash the board directly. Herewith an outline for how to do that (on Linux at least):
- Plug the ISP into the 6-pin header on the bridge board. If you have the ISP set to power the board make sure you haven’t got the bridge’s own power supply plugged in.
- Make sure you’ve followed the instructions at the bottom of the page here about udev to ensure you have the appropriate permissions to access the programmer.
- From the Arduino IDE, burn the bootloader. To do this, first ensure
Tools->Board->Arduino Pro or Pro Mini (3.3V, 8 MHz) w/ ATmega328is selected. Then doTools->Burn Bootloader->w/ USBtinyISP. Of course, if you’re using a different ISP, select the one for you. This takes a little while to complete, but it is worth the wait. - Once you have a sketch you want to upload, select
Sketch->Verify/Compile. This generates the hex file we need in a temporary directory with a name like/tmp/build3473620529065332403.tmp. The hex file itself will have the same name as your sketch, but with a.cpp.hexfile extension. - Use
avrdudeto upload the file and you are done.
$ cd /tmp/build3473620529065332403.tmp/
$ ls \*.cpp.hex
MyBridgeCode.cpp.hex
$ avrdude -pm328p -cusbtiny -D \
      -Uflash:w:MyBridgeCode.cpp.hex
...
As for a sketch to use, the basic one I wrote over two years ago needs some considerable updating. It uses absolute positioning in the XML feed to find the data it wants. This makes it fragile to any timing issues in the serial feed; something the CurrentCost can occasionally suffer from. Nor does the sketch handle the multiple sensors and channels that the newer hardware supports.
On top of that, there are some differences specific to the Bridge that need to be accounted for. The serial connection from the CurrentCost is connected to digital pins 0 and 1 which means we can use the built-in Serial object to access it rather than use the SoftwareSerial library.
As John mentions in his post, the Ethernet chip’s reset pin is connected to a digital pin on the Arduino - so something like the following can be used to to cleanly enable it:
pinMode(7,OUTPUT);
digitalWrite(7,LOW);
delay(250);
digitalWrite(7,HIGH);
pinMode(7,INPUT);
delay(500);
With all that in mind, I’ve put a new sketch on Github that does all of this and more. It uses the UUID of the bridge (stored in EEPROM) to generate both the client ID to connect with and the topic to publish to. This lets the same sketch run on multiple bridges without having to recompile with instance-specific settings. Some of the other features of the sketch are:
- generates a new 16-byte UUID if it doesn’t find one in EEPROM
- uses the last 6-bytes of the UUID as the MAC address
- uses DHCP to obtain a local IP address
- uses DNS to look-up the server address if
SERVER_HOST_NAMEis defined - otherwise expectsSERVER_IP_ADDRESSto define the address to use. - reconnects to the MQTT server if the connection is lost
- publishes readings to the topic structure “
cc/[uuid]/[sensor]/[channel]” - if
PUBLISH_CONNECTION_STATEis defined, connection status is maintained on the topic “cc/[uuid]/s”. A retained message is published with the value ‘1’ when the bridge connects. A Will message is set so that if the bridge loses its connection, a retained message will be published to this topic with the value ‘0’. - if
PUBLISH_TEMPERATUREis defined, temperature is published to the topic “cc/[uuid]/t”. It is published as a retained message and will only republish a temperature when it is 0.5 different to the last one sent
The sketch was developed using arduino-0022, the latest version of my PubSubClient library and the DHCP/DNS libraries from Adrian - links to these are in the sketch. Once the next version of Arduino is released, I will refresh the sketch to use that - as the DHCP/DNS libraries ought to be part of the standard distribution by then.

