Orb: The LED Board
02 Apr 2012[ part of the orb series ]
 The top board in the Orb is the most simple - all it needs is three RGB LEDs and their resistors.
A quick search on ebay found a good supply of LEDs similar to those used on the BlinkMs. The datasheet on the auction listing gave me all the information I needed to start laying out the PCB.
I considered writing a more detailed post about using Eagle, but there are plenty of tutorials out there already (here’s the Sparkfun one that got me started).
The Eagle files for the board are on github.
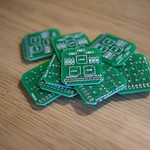
With that done, I looked around at options for getting the PCB made. Olimex had been recommended to me by a colleague, but to be honest I found their long list of design rules quite overwhelming for a first timer. I eventually settled on SeeedStudio’s Fusion PCB service - who provide their own Eagle design rules file for you to run against your design. It worked out at about £1 for each board - which seemed pretty reasonable and you get 10 of them to play with.
The only downside was the wait - it took just over three weeks for the boards to arrive. Rapid prototyping for those not in a hurry.
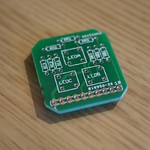

When they did eventually arrive, it didn’t take me long to find the faults in the design. Despite my hours staring at the layout in Eagle, there were a couple things wrong. First, I realised I had missed a connection on the board layout - this was before I learnt enough about the Ratsnest tool which would have spotted the mistake. The second fault was with the custom Eagle part I had made for the LEDs - the outline was rotated 90°, putting GND somewhere it shouldn’t be. I didn’t spot this until I was figuring out what had caused the LEDs to burn-out on my first fully soldered board. Thankfully both of these could be resolved without having to get another batch of boards made - a jumper wire replaces the missing connection and I need to remember to ignore the printed outline when placing the LEDs.
With these faults worked around, I had a working LED board. It only took a handful of wires and an Arduino to see it in action. Cue the video.