Creating a flow
Before we start on the photo booth application, we're going to step through a quick example to help get you more familiar with Node-RED.
-
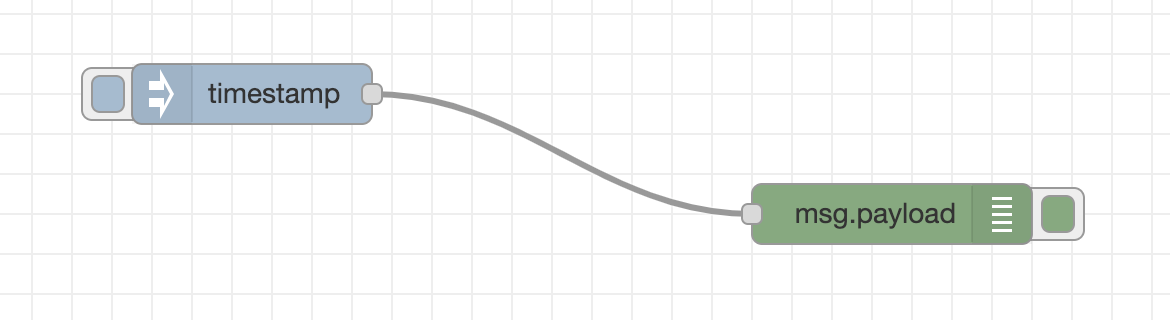
From the palette, drag an
Injectnode into workspace. This node can be used to manually inject messages into a flow, or to inject them at a regular interval. -
Drag a
Debugnode into the workspace. This is a very useful node that can be used to examine messages in a flow by displaying them in the Debug sidebar. -
Drag a wire from the output of the
Injectnode to the input of theDebugnode. The wires determine where messages go when they pass from one node to another. -
Click the red Deploy button to save your changes. At this point your flow is now running.
-
Click the button to the left of the Inject node - this triggers it to send a message. By default it will send a message with its
payloadset to the current time. -
You should see the message get displayed in the Debug sidebar.
Core Nodes
Node-RED comes with a number of core nodes that are the basic building blocks for any flow. It's worth spending a bit of time exploring what is available.
The documentation has more information about them.
Debug sidebar
The Debug node and sidebar are invaluable tools when creating flows. They help you understand the structure of the messages you are working.
The "Working with messages" section of the documentation gives a good introduction in how to make the most of the Debug tools.
Import/Exporting Flows
Node-RED flows can be imported and exported from the editor using a JSON format.
To import a flow, select the Import option from the menu (or hit Ctrl-I). This
opens the import dialog.
Copy the JSON below, paste it in and click Import. You will find a number of nodes
attached to your mouse that you can click to place into the workspace.
[{"id":"10cd970c.dcde99","type":"http in","z":"ddeb3b89.ad9748","name":"",
"url":"/hello","method":"get","upload":false,"swaggerDoc":"","x":140,"y":140,
"wires":[["ec1f6830.222e38","43f8e071.77d4a"]]},{"id":"ec1f6830.222e38","type":"template",
"z":"ddeb3b89.ad9748","name":"","field":"payload","fieldType":"msg","format":"handlebars",
"syntax":"mustache","template":"{{# payload.name }}\n<p>Hello, {{{payload.name}}}!</p>\n{{/ payload.name }}\n{{^ payload.name }}\n<form action=\"/hello\" method=\"GET\">\n    What is your name? <input name=\"name\">\n    <button>Submit</button>\n</form>\n\n\n{{/ payload.name }}\n",
"output":"str","x":340,"y":140,"wires":[["87f3adff.c4e43"]]},{"id":"87f3adff.c4e43",
"type":"http response","z":"ddeb3b89.ad9748","name":"","statusCode":"","headers":{},"x":510,
"y":140,"wires":[]},{"id":"43f8e071.77d4a","type":"debug","z":"ddeb3b89.ad9748",
"name":"","active":true,"tosidebar":true,"console":false,"tostatus":false,
"complete":"false","statusVal":"","statusType":"auto","x":350,"y":80,"wires":[]}]
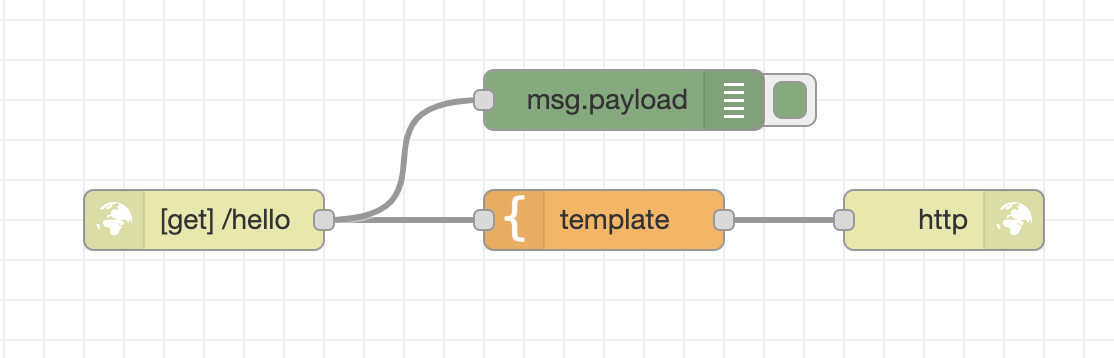
This gives you a flow that starts with a HTTP In, configured to listen for
requests on /hello. When a request arrives, it gets passed to a Template node
that generates some simple HTML using the contents of the message. It then gets
passed to a HTTP Response node to send back the response.
You can see it in action by opening http://localhost:1880/hello.
Next Steps
The final task in this part of the workshop is to commit your changes.